Notion is one of those things that’s almost too flexible. There are so many different ways to do what you want, you get stuck on “but what’s the best way?” Rather than getting stuck, let’s just go with this and adjust when needed.
Volkis Handbook
The Volkis Handbook section (actually called a “Database” in Notion), is where the bulk of our information lives. It comprises both public and private pages, with the public pages being compiled to our online Handbook.
The handbook has multiple different “views” to help you navigate around:
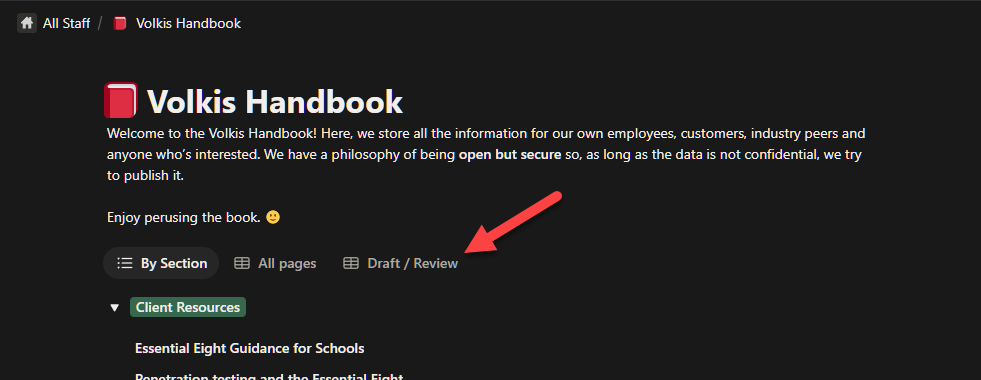
The easiest way to find information is to use Notion’s own search. The keyboard shortcut is Ctrl+K (Mac users, you’re on your own).
Property Overview
Each handbook page has a set of properties (* denotes a mandatory field):
- Category*: The function of the company that the page best relates to.
- Status*: The state of the page. We’ll go into more details for how to use these shortly.
- Owner: The person responsible for maintaining the page’s accuracy.
- Last edited time*: Automatically adjusted field for when the page was edited last.
- Last review date: When the page was last reviewed start to finish.
- Parent item & Sub-item: Organisational properties that are auto-filled. You don’t need to worry about these.
Although you can edit each one of these properties, do not create new properties or delete existing ones. That will have disastrous implication beyond imagine!
Creating a new page
A handbook page starts its humble life quite empty. Before you start writing, check 3 things:
- The Category is set. Choose one that you think fits best. It may change during review anyway.
- The Status is set to “Draft”.
- You are set as the Owner.
Now let your creativity run wild and write the page. You may want to reference the Style Guide while you write - especially the Handbook specific styles.
Once you’re finished, it’s ready for review. Set the page’s status to “In Review”.
Before going live, every page must be reviewed by either Matt or Alexei. If you want someone else to review the page, send it to them using MayGibsQA.
Yeeting the page
⚠️ Do not set the status to “Live - *” yourself, unless you are Matt or Alexei.
The page is now ready to go live! Matt or Alexei will set it to either:
- Live - Internal: The page is visible on in the Table of Contents and this signals to everyone that its content can be relied on.
- Live - Public: Same as “Live - Internal”, but it will also be compiled to our internet-facing Handbook. So be careful not to put anything private/sensitive.
The page will also be “Locked” by Matt or Alexei to prevent unintentional edits in the future.
Editing an existing page
In the interest of openness, anyone can edit any page!
To do so, first unlock the page by clicking “Unlock for me”:
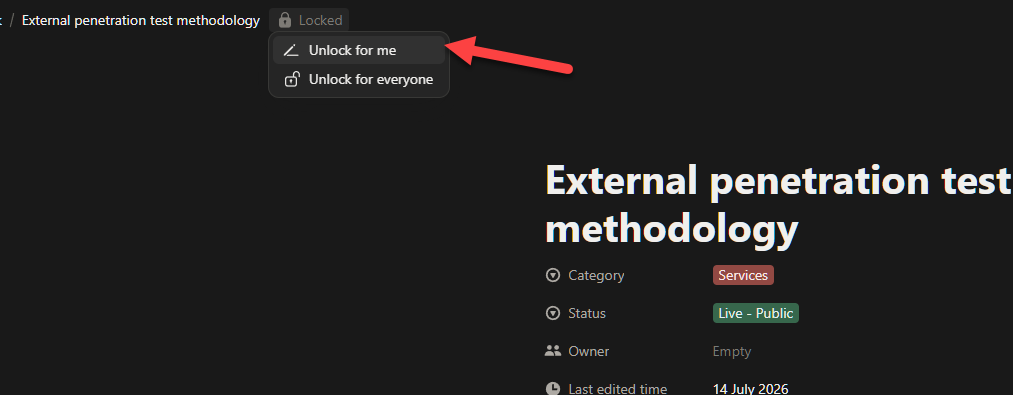
Make your edits. If the edits are significant, you may want to set the status back to “In Review” and have it reviewed by Matt or Alexei again. If it’s just a typo fix, no need to do this. Use your own judgement here. Just remember not to add private/sensitive content to “Live - Public” pages.
Once the edits are complete, hit the “Re-lock” button at the top.
Parent pages & sub-pages
Parent pages and sub-pages are a way to group pages of similar topics together. Methodologies is a good example of a parent page, while all the actual methodologies are sub-pages. This lets the sub-pages show up as “nested” under the parent page.
Use this type of grouping sparingly. Groups should be very specific. For example, “Attack Walkthroughs” is a useful group, whereas “Guides” is not since it provides no information about what topics are in its sub-pages. Avoid generic groups like:
- Policies/Processes/Procedures
- Guides
- Documents
Create a parent page like you would any other page, then drag pages that you want to group under the new parent page. The Parent item & Sub-item properties should take care of themselves after you drag pages into the right place - you shouldn’t need to edit them manually.
Parent page contents
A parent page should have links to all of its sub-pages in the body of the page. This can be done one of two ways.
Simple List
Write a short description of the grouping and create a filtered list view for the Handbook database like so:
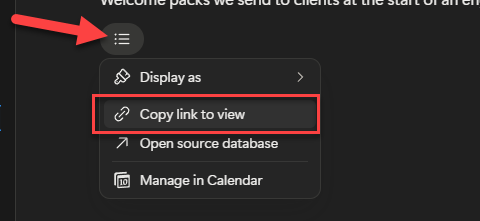
- Go to Welcome Packs. Right-click the list icon and select Copy link to view.
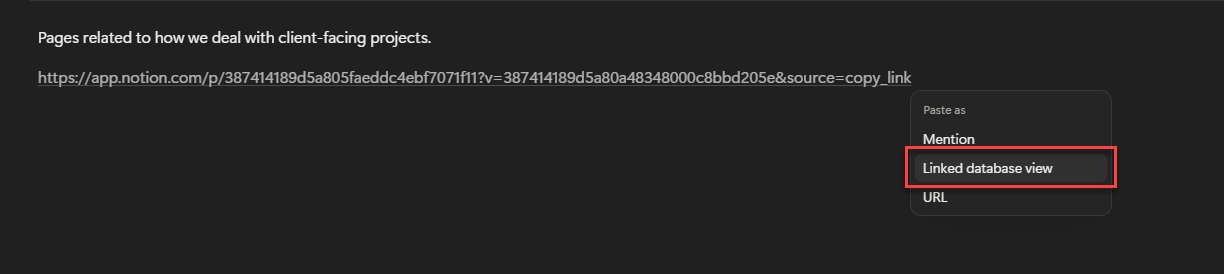
- Paste the link in the parent page and select Linked database view.
- Change the “Parent item” filter to the newly created parent page.
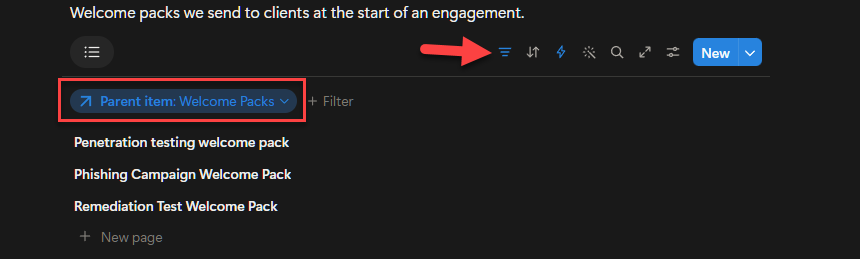
- Click Save for everyone.
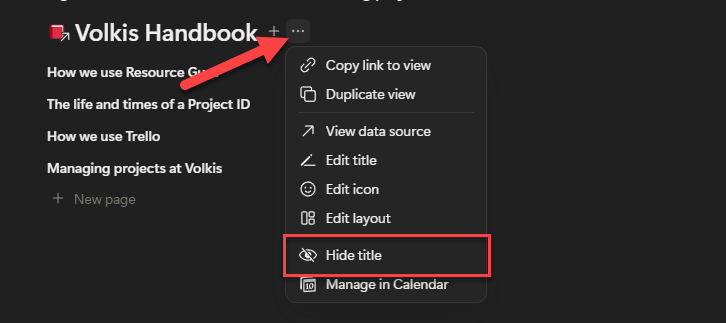
- Lastly, some clean-up. Go to
...and select Hide title.
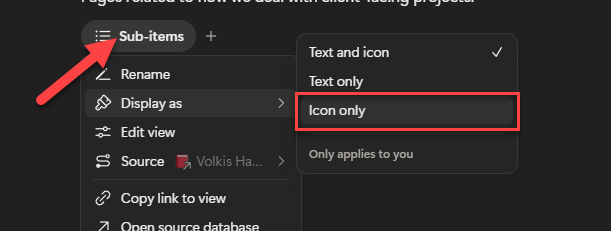
- Right-click on Sub-items and change appearance to Icon only.
Use Welcome Packs as a reference of what the final result should look like.
Custom Page
Write an entire page of its own, manually linking all sub-pages. Use Methodologies as a reference.
Parent page status
If any sub-page is “Live - Public” then its parent must also be “Live - Public”. Otherwise some pages might not show correctly. Not all sub-pages have to have the same status as their parent though. Pages marked “Live - Internal” will remain private, while “Live - Public” pages will be internet-facing.