Why?
When you’re performing a project like a penetration test, you might want to use a cloud VPS for multiple reasons. Some of the common reasons are:
- You are required to use a whitelisted IP address
- You have the need… The need for (internet) speed!
- You need an externally available host to listen for incoming connections
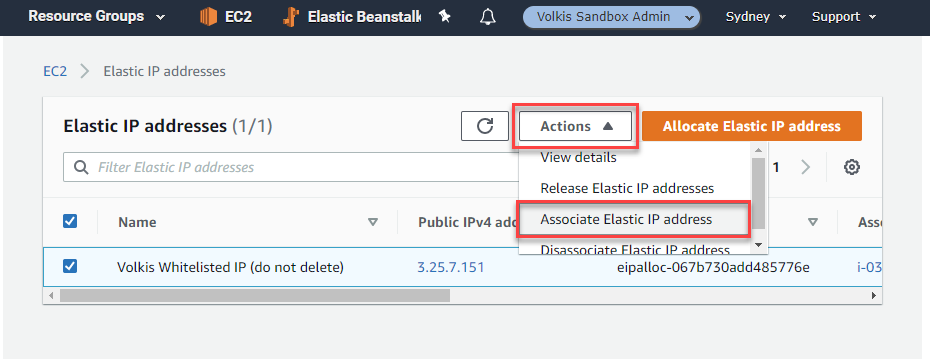
Whitelisting IP addresses
Volkis has an official IP address that clients can whitelist. It always resolves from out.volk.is. Here it is in our Sandbox AWS environment…

(Like it says, don’t delete this IP after you’re done testing.)
If you want clients to whitelist an IP address for testing purposes, you should strongly prefer giving them this one rather than your home/office IP address. This is done for consistency and also for security. Your home IP might rotate and be given to someone else while the client might forget to remove it from the whitelist.
The same applies for when the client asks you to test from a predefined IP addresses.
Creating a testing instance
The Sandbox AWS environment is there specifically for this purpose. Feel free to play with what you need in here. In this guide, we’ll just focus on EC2. Let’s get started…
- Create your EC2 instance - size is up to you, but limit it for what you think you’ll need.
- Assign the whitelisted IP address to this instance.
-
Choose the instance you just created.
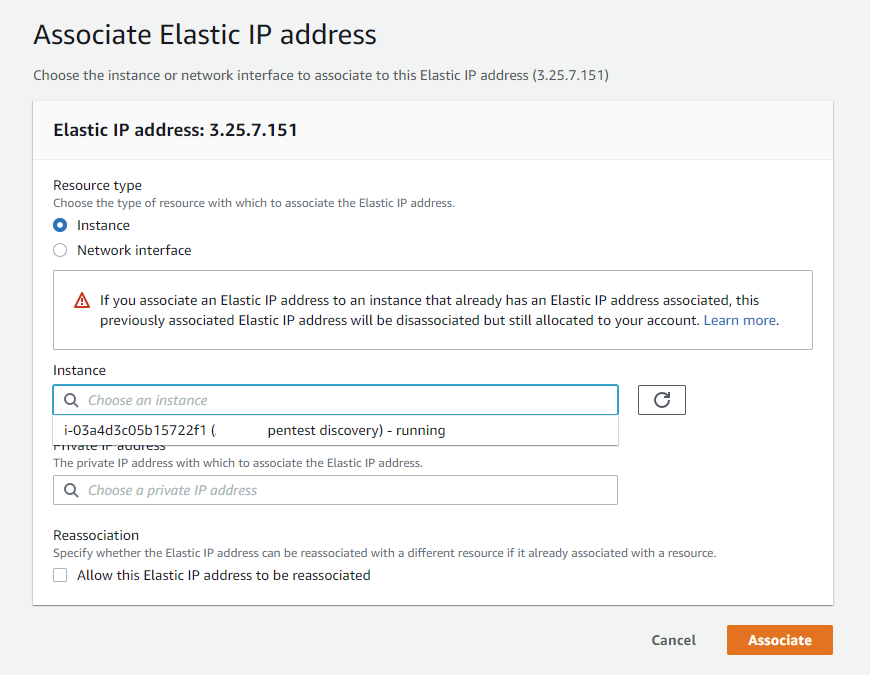
- SSH to your new instance! From here you can install whatever tools you need. ⚠️ Remember to remove this instance once you’re finished with it, but leave the IP (it will auto disassociate).
Tunnelling local tools to your testing host using WireGuard (preferred)
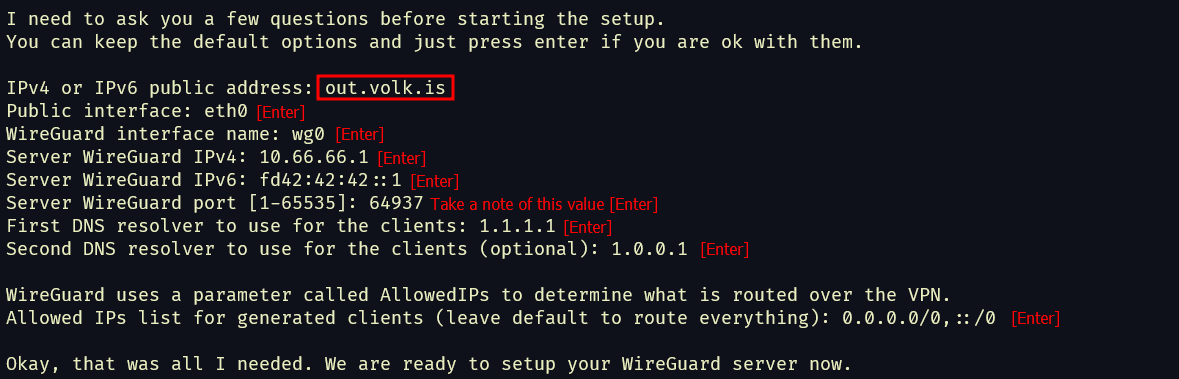
A lot of the time you might not want to install everything you need on the testing host. Instead, to save time, you can use WireGuard to tunnel your traffic through the whitelisted IP address. Installing and using WireGuard is super simple and we’ll go over that process now. Also big thanks to Angristan on GitHub for providing an awesome installation repository we will use.
- (SSH into the box if you haven’t already).
- Run the following commands to start the set up process:
cd /tmp/
curl -O https://raw.githubusercontent.com/angristan/wireguard-install/master/wireguard-install.sh
chmod +x wireguard-install.sh
sudo ./wireguard-install.sh
- Follow the prompts to configure it how you like. Here’s an example config input.
- It will take some time to install everything, so sit back and relax.
- Follow the last prompts to configure the client information. You can type anything you want for Client Name, just something memorable. Your hacker handle is sensible here. 😉

- Once it’s done you can copy the newly created
.conffile to your local system (check the end of the output for its location). - ⚠️ Don’t forget to allow your chosen WireGuard port in the AWS security group linked to your instance.
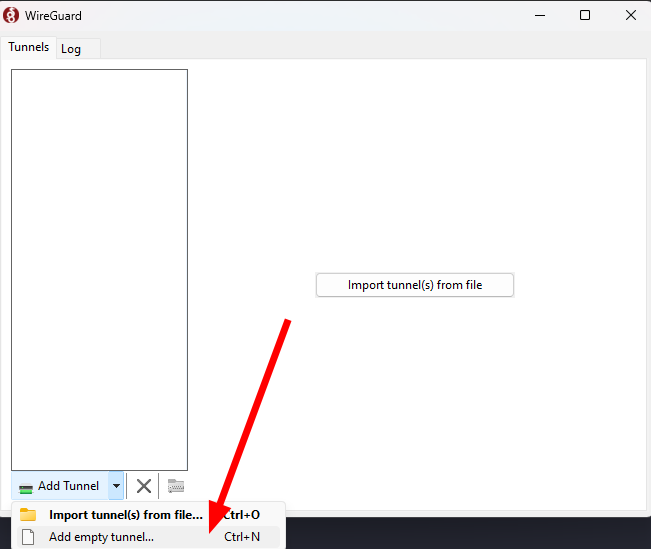
Next we’re going to use the Wireguard client to import the configuration.
- (Install the Wireguard client on your local system if you haven’t already).
- Open the WireGuard client and click on Import Profile.
- Copy the
.conffile you copied earlier. - Click the Activate button to connect to the Wireguard server. Hopefully in a few seconds, you should be connected to the VPN. Now all your traffic should come out of the whitelisted IP address.
- To make sure it is, you can try running this command:
curl ifconfig.me/ip
Once you’re done testing, remember to delete the host and everything associated with it like:
- The instance
- Security groups
- Keypairs
- ⚠️ But NOT the whitelisted IP address - if you’re using other IP addresses, deleting those is fine