What is trello?
Trello is for managing tasks and our client facing projects to make sure we don’t miss anything obvious and to have a place where everyone can view the status of a project at any given time. This guide will step you through the lifecycle of a card in Trello, following an example project with a fictional client named Acme Inc. (they make dynamite 💥 and anvils).
The structure of Trello
Trello is made up of one or more Boards. A Board is simply a place to put Cards. Cards live in Lists, inside the Board. Here’s a picture to simplify things:
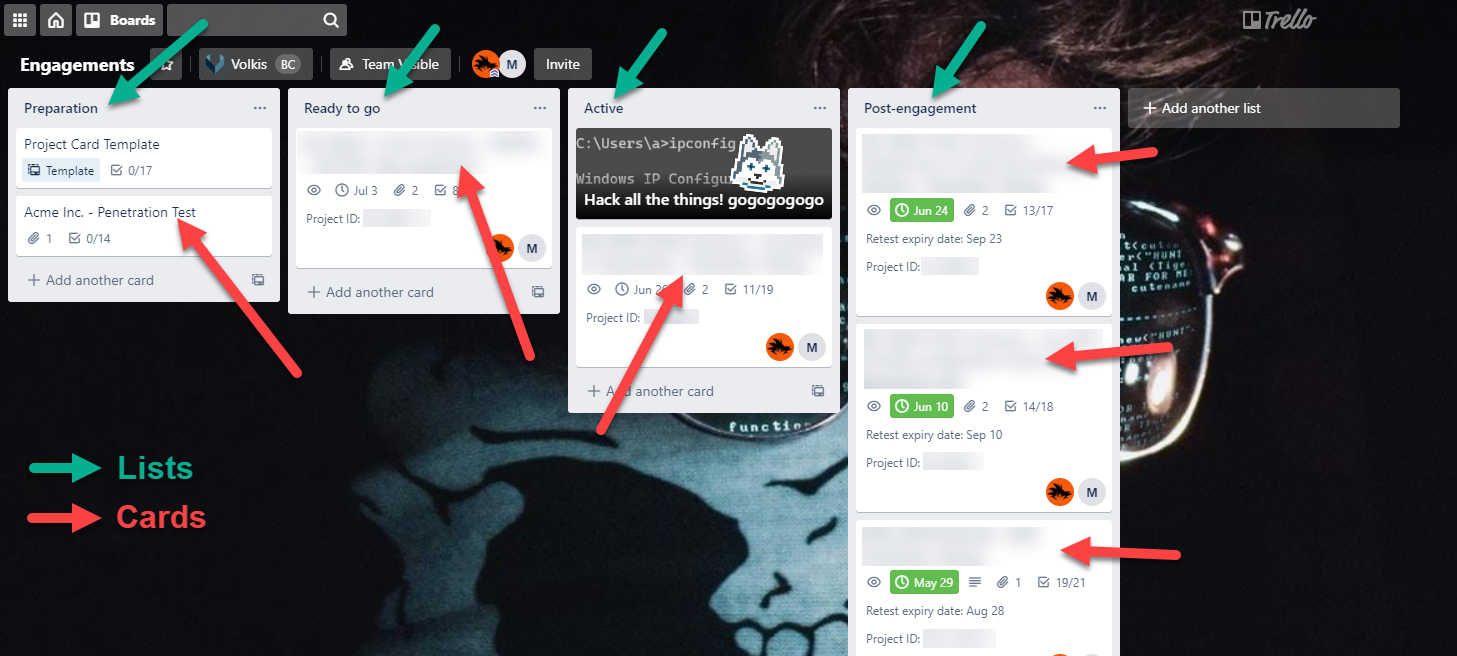
This is our Engagements board where we track our client projects. The entire thing is the Board. The green arrows point to Lists and the red arrows point to Cards. Each project has its own Card and is generally mapped to exactly one proposal. So, 1 proposal = 1 project = 1 Card.
You can see our project for Acme Inc. is already in there. When a proposal is accepted, that Card will be automatically created in the Preparation list for someone’s attention. Let’s take a look at what’s inside a Card:
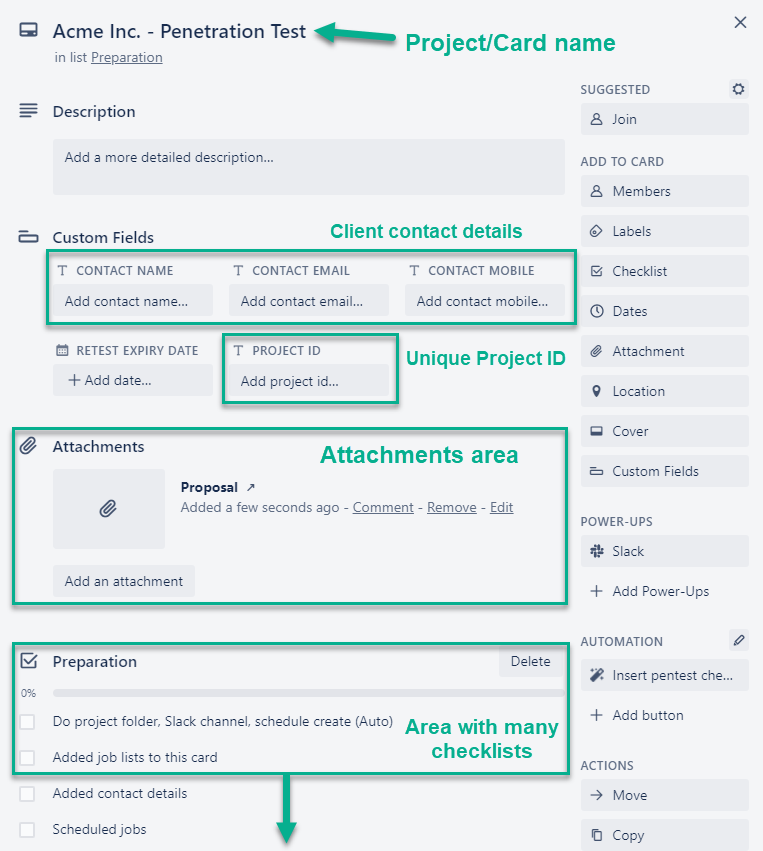
Things to take particular note of:
- The Project/Card Name must be consistently used in many places, including in Slack, SharePoint and Resource Guru, otherwise things will break. You’ll probably never have to change it manually.
- The Contact details fields show the name, email and mobile number of the client contact. This is here so that all consultants know who they should contact in case of any questions or updates. We will need to fill it in later.
- The Project ID should already be filled in for you. We go into detail about the Project ID in the next section.
- The Attachments area will contain at least links to the Slack channel and the Proposal. You can add more attachments if you’d like. 🙂
- The Checklists area is where you’ll see some templated checklists 🗒. You can also add others as needed.
The Project ID
A long time ago in a galaxy far far away, you had fill in the Project ID field yourself. This is now done automatically for you, but it’s still important to understand the structure of a Project ID.
We use the notation of CCC-YYMMDD-I where:
- CCC is the 2-3 character client code, in capital letters.
- YYMMDD is the 2 digit year, 2 digit month and 2 digit day of when the proposal was accepted.
- The final -I is only used if the same client accepts 2 or more proposals on the same day. The I part starts at 0 and is incremented by 1 for every new project.
So for Acme Inc. we might have the Project ID of AC-200624. This is the same as writing AC-200624-0, but the -0 can be omitted. If they accepted another proposal on the same day, that new ID would be AC-200624-1 and if they accepted a 3rd proposal, the 3rd project would have the ID AC-200624-2.
⚠ Remember to use the 2 digit year. Not the 4 digit year. For example, this is wrong: AC-20200624
If, for some reason, you need to change the Project ID, you must do this in 4 places:
- In the Project ID field in Trello;
- In the Card Name field in Trello;
- In the corresponding Deal in Pipedrive;
- In the Project Code field in Resource Guru (only after project creation).
Changing a Project ID is an edge case so you shouldn’t need to do it often.
Project preparation
Let’s get started on that Preparations checklist! Each item needs to be checked before a project can actually start. As a rule, only check ✔️ an item after it has been completed. This is generally good practice, but is also essential for some automation to work.
First order of business states…
Do project folder, Slack channel, schedule create (Auto)
🛑 STOP 🛑 Before you click this checkbox, make sure that the title of the card has changed to include the project ID.
Notice the (Auto) at the end? That tells us that this task is going to be performed automatically for us. The checkbox exists merely as a trigger for this task. Once it’s checked, wait a bit and you should see the Slack channel,the project folder and the Project object in Resource Guru be created. The Slack channel will also automatically be attached to the Trello card.
Add job lists to this card
The card doesn’t have any tasks for the actual project work yet. We need to add these, and we can do that by pressing the Insert pentest checklist button on the right. This will add a generic checklist to the card called [some] penetration test.
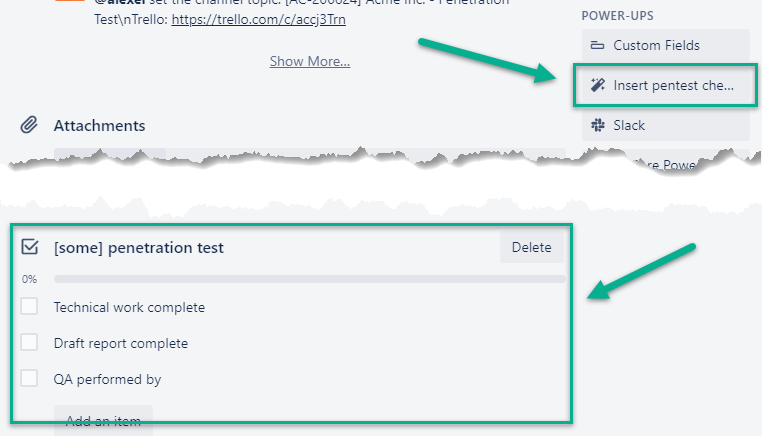
You can change this entire checklist however you like to fit the project. Insert as many checklists as the project needs. Usually, this would be one checklist per project task. For example, our Acme project has an internal pentest and external pentest component, so we need to reflect that and move the new checklists to the proper location. The Card now looks something like this:
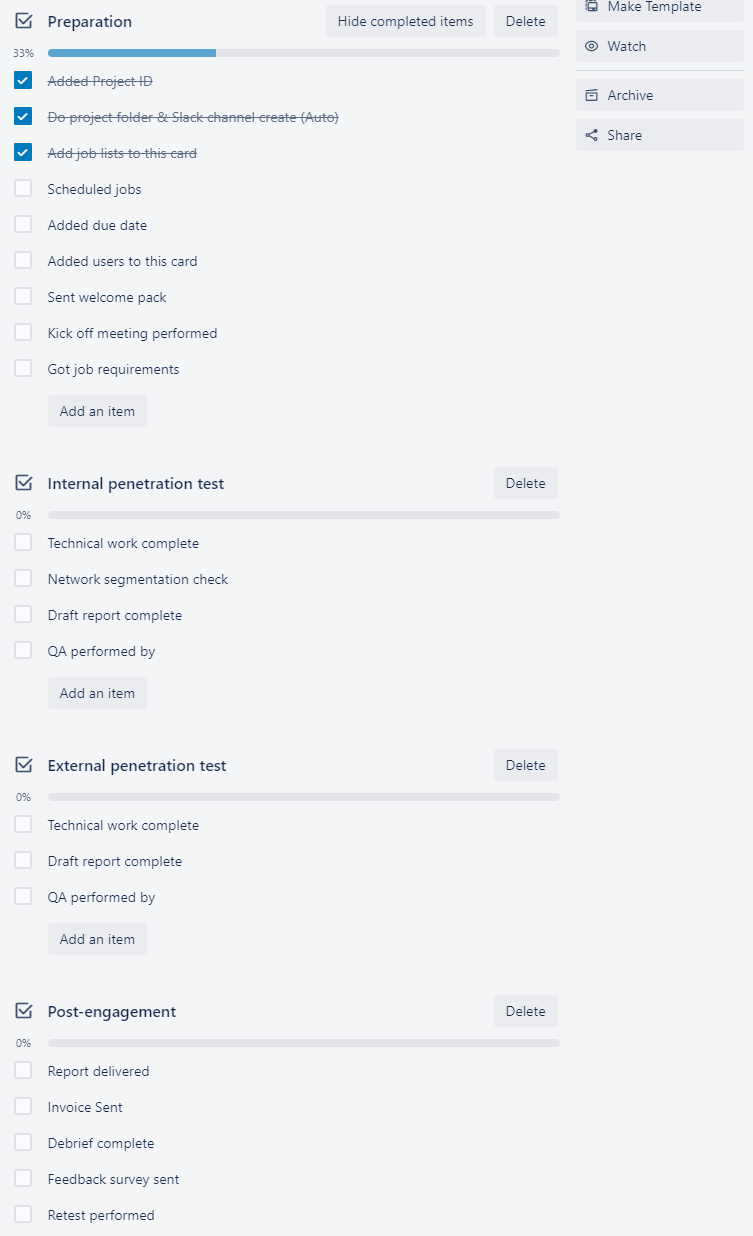
The network segmentation check was a special request by the client, so we added that extra checkbox, which is totally fine! Don’t forget to check the box in Preparation once we’re done.
Added contact details
Add the contact details to the custom fields at the top of the card. We need the contact details of the main person to speak to during the engagement. In the case of work through a partner, this should be someone from the end-client’s side. We must fill this in so that everyone doing work on this project knows who to contact in case of questions or for updates.
Most likely, this will be someone with intimate knowledge of the project scope. If in doubt, ask the person you sent the proposal to.
⚠️ The contact we fill in here might not necessarily be the person we send the report to.
Scheduled jobs
Scheduling is done in Resource Guru. The project object should already be created, so simply make a new booking against a consultant and assign the right project to that booking.
If there are multiple parts to the project, add what part the consultant should be doing, into the Details section.
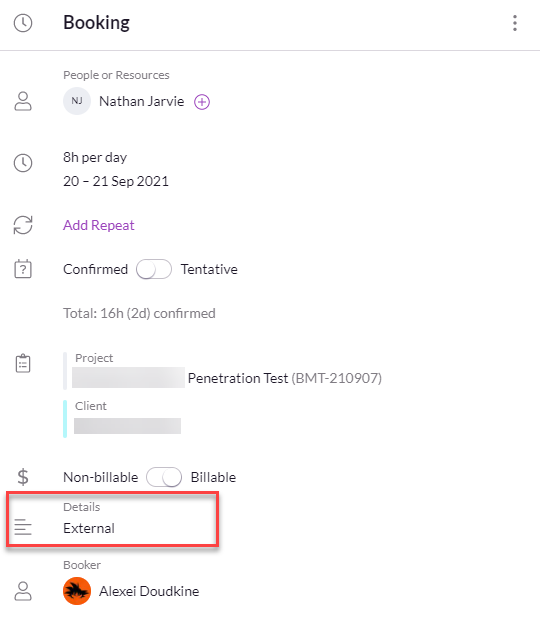
Check out the full guide to how we use Resource Guru.
Added due date
Set the due date to when the client expects the report. Normally, this is 1 week after the technical work is complete.
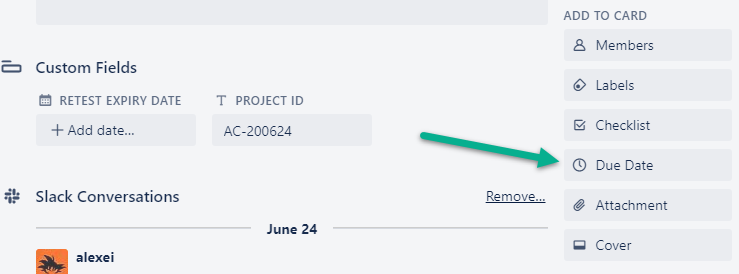
Remember to keep this up to date if client expectations change.
Added users to this card
We need to add everyone who is involved in this project to the card. You can either click the Members button on the right or you can drag the user’s icon onto the Card from the Board screen.
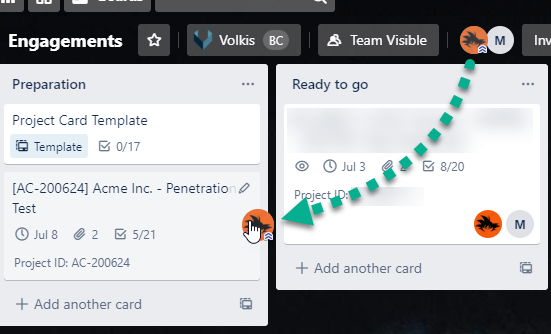
Adding the user to a Card will allow them to access the project folder and also add them to the Slack channel.
Getting more specific, you can also assign a user to a specific task in a checklist by mousing over that task end clicking the little add user button. This is helpful when more than one consultant is involved in a project.
Finishing up preparations
The final 3 checks…
- Sent welcome pack
- Kick off meeting performed
- Got job requirements
… are just there to remind you that they should be done. Check them as they are complete.
Once the entire Preparations checklist is complete, the Card will automatically be transitioned to the Ready to go.
Ready to go
The Ready to go list simply shows the projects which have all their prerequisites complete, but aren’t ready to actually start yet. Once the job is started, the card should be moved into the Active list.
Active
As the job tasks are complete, the checkboxes are checked by the person who has performed them. This is so others can track the status of the project.
Post-engagement
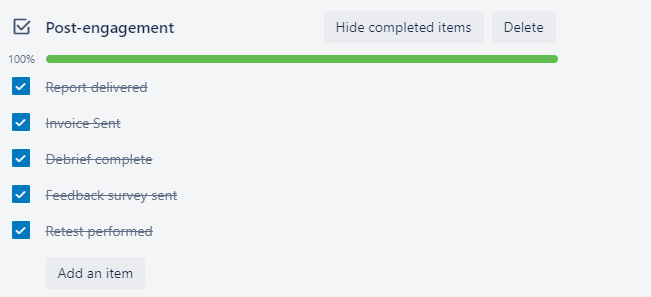
The engagement is considered “complete” when the report is sent to the client, but there are still things we need to track even after that. This is why the post-engagement checklist exists.
Report delivered
A consultant will send the final report to the client and check this box. Once it is checked, the Card will automatically go into the Post-engagement checklist. The Retest expiry date field will also be set automatically for 3 months from today. Since the Acme Inc. project has an external pentest component, they may wish to perform a retest at some stage. They need to do this within 90 days, and this field helps us track that so we can send them reminders as needed.
Closing out the project
The rest of the items in the list exist just for reminders. Check them when the task is complete and delete them if that task is irrelevant. For example, projects with only an internal penetration test don’t have a retest component, so that item can be removed. The Card should stay in this list until all tasks are completed and checked.
Archiving the Card
Once all tasks are complete, it’s time to say goodbye to this project for good. We’re going to archive the card by pressing the Archive button on the right.
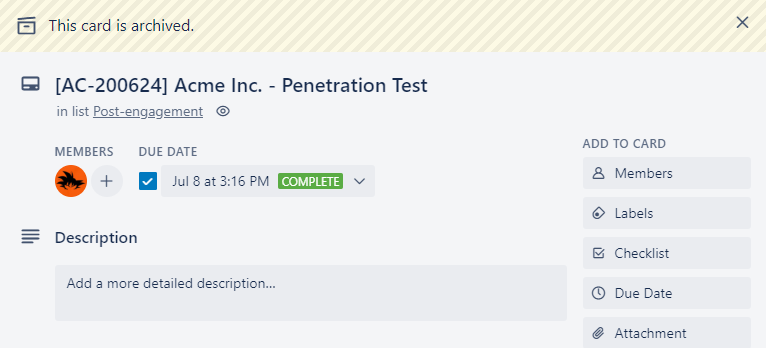
Bye bye project! It’s been fun… 👋